Installing OpenCV with Python 3.5
Virtual environments are nifty subspaces created by the computer where all dependencies remain in one place and are independent from the main system. It matters because with them its possible to modify files and install new dependencies without affecting the rest of our system files and even have different versions in the main system and on each project independently.
That is amazing because it means we can maintain legacy code and experiment with state of the art on different folders without things breaking. Definitely a must use.
UPDATE: Save yourself the pain! Use Anaconda!
A nifty virtual environment similar to virtual env but with the latest OpenCV distribution already prepackaged along with many other scientific computing packages.
Installing Anaconda
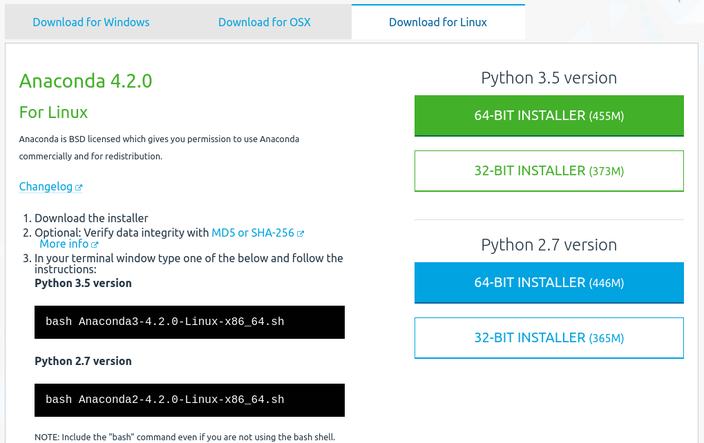
Go to the Anaconda webpage [1] and download the latest version. It comes with python prepackaged so you don't have to mess your system environment.
Next open a Terminal and move to the directory where you stored your anaconda download. Convert the file into executable using chmod.
$ chmod +x Anaconda3-4.2.0-Linux-x86_64.sh
And initialize the application using bash or ./
$ ./Anaconda3-4.2.0-Linux-x86_64.sh
It will prompt several options, I used defaults because when I tried to install it on a custom directory, somehow requests failed to load. Suggest using default in your install.
Once finished we create a virtual environment[2] with the command: conda create -n <ENVIRONMENT_NAME>
$ conda create -n virtualenv
And activate it using
$ source activate virtualenv
Finally to install opencv we use the command [3]
$ conda install -c menpo opencv3=3.1.0
The last part may vary in the future so I suggest googling the latest opencv version and using the specified conda install path.
References
[1] https://www.continuum.io/downloads
[2] https://rivercitylabs.org/up-and-running-with-opencv3-and-python-3-anaconda-edition/
[3] https://anaconda.org/menpo/opencv3
[2] https://rivercitylabs.org/up-and-running-with-opencv3-and-python-3-anaconda-edition/
[3] https://anaconda.org/menpo/opencv3
OLD STUFF - IGNORE
Turns out installing OpenCV 3.0.1 is a pain in the ass. At least for systems that possess dependencies that are already installed, are old and aren't compatible with the new OpenCV files. In my case Python's switch from 3.0 to 3.5 has been a pain to deal with.
Do yourself a favor and install virtual environments boys! It will save your life.
Do yourself a favor and install virtual environments boys! It will save your life.
What are virtual environments and why should we care?
Virtual environments are nifty subspaces created by the computer where all dependencies remain in one place and are independent from the main system. It matters because with them its possible to modify files and install new dependencies without affecting the rest of our system files and even have different versions in the main system and on each project independently.
That is amazing because it means we can maintain legacy code and experiment with state of the art on different folders without things breaking. Definitely a must use.
$ sudo pip install virtualenv
Or in my case with my Python3.5 install.
$ sudo python3.5 -m pip install virtualenv
That is amazing because it means we can maintain legacy code and experiment with state of the art on different folders without things breaking. Definitely a must use.
$ sudo pip install virtualenv
Or in my case with my Python3.5 install.
$ sudo python3.5 -m pip install virtualenv

Next we want to create our Python virtual environment using: virtualenv -p /usr/bin/<PYTHON_VERSION> <NAME_OF_ENVIRONMENT>
$ virtualenv -p /usr/bin/python3.5 virtenv
$ virtualenv -p /usr/bin/python3.5 virtenv
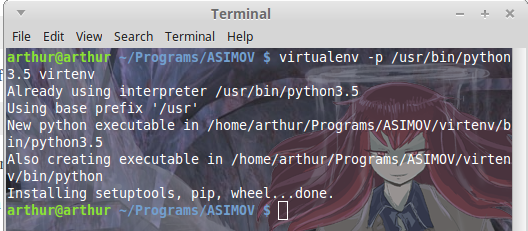
Finally we activate our virtual environment so that we can make use of it.
$ source virtenv/bin/activate
And we install packages as usual using pip. When we are done playing we simply type
$ deactivate
to end our environment and return to the main system as usual.
$ source virtenv/bin/activate
And we install packages as usual using pip. When we are done playing we simply type
$ deactivate
to end our environment and return to the main system as usual.
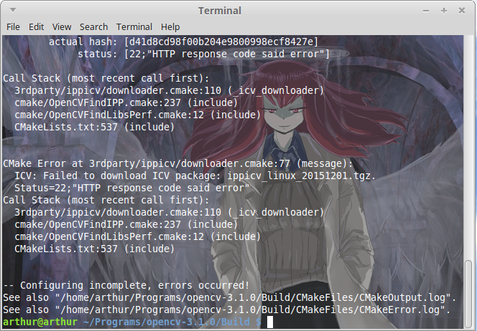
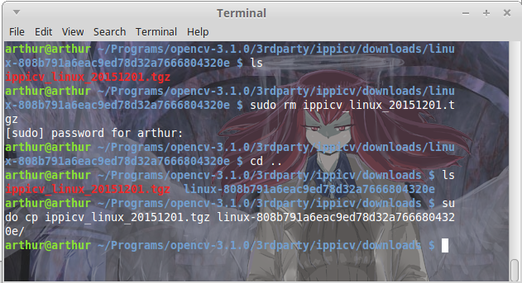
Due to opencv being unable to find ippicv, I had to manually download it from [3].
And then proceed to move it to the directory <OPENCV_PATH>/3rdparty/ippicv/downloads/linux-XXXXXXXXXXXXXXXXXXXX/ using the command
$ sudo mv ippicv_linux_20151201.tgz ~/<OPENCV_DIR>/opencv-3.1.0/3rdparty/ippicv/downloads
$ sudo mv ippicv_linux_20151201.tgz ~/<OPENCV_DIR>/opencv-3.1.0/3rdparty/ippicv/downloads
Then had to manually download and rebuild ffmpeg version 2.7.1 using the command:
$ ./configure --enable-nonfree --enable-pic
$ sudo make
$ sudo make install
$ ./configure --enable-nonfree --enable-pic
$ sudo make
$ sudo make install

And afterwards had to manually link Python3.5 to my OpenCV install as it was shadowed by Python3.4 which was in turn shadowed by Python2.7
Extreme measures
$ cp /usr/local/lib/python2.7/site-packages/cv* <VIRTUALENV>/lib/python2.7/site-packages
sudo cmake -D CMAKE_BUILD_TYPE=RELEASE \
-D CMAKE_INSTALL_PREFIX=/usr/local \
-D INSTALL_C_EXAMPLES=OFF \
-D INSTALL_PYTHON_EXAMPLES=ON \
-D OPENCV_EXTRA_MODULES_PATH=~/Programs/opencv_contrib-3.1.0/modules/ \
-D BUILD_EXAMPLES=ON -DWITH_QT=OFF -DWITH_OPENGL=ON -D WITH_IPP=OFF -DWITH_TBB=OFF -DWITH_FFMPEG=OFF -DWITH_VTK=OFF ..
[1] http://askubuntu.com/questions/783956/how-to-install-opencv-3-1-for-python-3-5-on-ubuntu-16-04-lts
[2] http://answers.opencv.org/question/40425/opencv-build-fails-because-i-cannot-download-icv-on-our-build-farm/
[3] http://www.linuxfromscratch.org/blfs/view/svn/general/opencv.html
[4] http://www.pyimagesearch.com/2015/07/20/install-opencv-3-0-and-python-3-4-on-ubuntu/
[5] https://lists.ffmpeg.org/pipermail/ffmpeg-user/2011-August/002105.html
[6] http://stackoverflow.com/questions/17287250/install-opencv-for-python-multiple-python-versions
[7] http://www.megalinux.net/compiling-opencv-2-4-on-rhelcentos-5/
[8] http://www.pyimagesearch.com/2015/07/20/install-opencv-3-0-and-python-3-4-on-ubuntu/
[9] http://docs.python-guide.org/en/latest/dev/virtualenvs/
[10] https://github.com/cmusatyalab/openface/issues/30
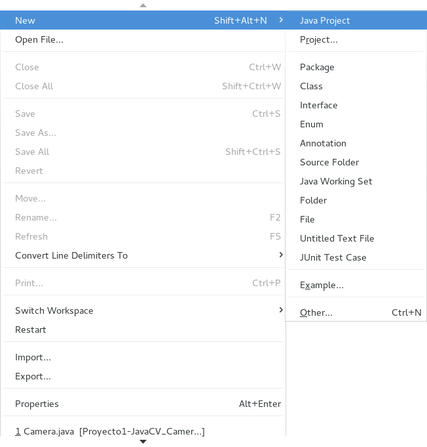
Camera capture with OpenCV in Java.
|
|
|
|