Home Automation Project.

I've always been fascinated by robotics due to the amount of possibilities to make our life easier that they provide, and a subject of particular interest to me is the area of domotics due to the fact that I believe that our homes could be seen as an extension of ourselves, a haven where we can rest from the layers of masks we wear on when outside and just relax and chill out and express ourselves. As such I believe we as Extropians must, not only improve our bodies but also our immediate environment which is an extension of ourselves as a means to progress and also to provide us with the comfort we need.
On a more practical side, automating our homes is also useful because by having to spend less time attending to chores we are able to spend more time on the things that we want to do rather than those that we have to and get more meaningful activities in our days.
On a more practical side, automating our homes is also useful because by having to spend less time attending to chores we are able to spend more time on the things that we want to do rather than those that we have to and get more meaningful activities in our days.
Objective.
Develop a home automation system that can be easily ported among the home and easily maintained by using a modular approach.
Phases.
- Establish the basic control protocols.
- Automate my room.
- Automate the kitchen.
- Automate the bathroom.
- Automate other appliances and waste disposal.
- Find a clean green energy sources to power the system.
Phase 1. Establish the basic control protocols.

I began thinking on the design to make the home automation system. I knew I wanted a control system that could be portable as I usually have to travel a lot, I thought it would be useful to be able to carry the system (or at least parts of it) whenever I have to travel or change residence. Also I wanted to be able to monitor the house and give orders to it from afar to for example, order it to clean itself while I'm away or to open/close doors or windows.
At first I thought I'd distribute the architecture using 16F84 or 16F887A for every module and control them through a micromedia for PIC32MX that I bought for a microcontrollers class. But then I had to buy separate internet modules and a Real Time Clock to keep track of the timing (I want the system to have several automatic alarms) so I discarded that (although plan to use the PIC16F887 to control the rest of the modules once I finish the first version).
Then I remembered about Processing which is a language that has been extensively in use at my University and that uses a Java like structure (its Java based) to enable the creation of GUI's (Graphic User Interface). It's a language I've wanted to learn for a long time and when I found it has Arduino support (Arduino is my favorite microcontroller brand because I'm all for free open-source) and as such decided to control the whole system from a PC as it will enable me to easily monitor and modify the system as I see fit rather than having to trouble myself with modifying the code to suit every microcontroller brand and also to make use of the Internet protocols to upload data to the net for monitoring and personal use.
From the PC the data will be sent to an Arduino microcontroller from which I'll begin to stream data to the rest of the devices (once I get to buy an Ethernet or BlueTooth shield).
I found out that Processing is slightly more troublesome to set these days as the firmware data has been updated and is no longer compatible with the Arduino firmware provided from the page (it hasn't been actualized while Processing has). So lets tackle this first hurdle!
Setting up Processing-Arduino communication.
- First thing is to download the Processing and Arduino applications which you can get from their respective webpages, which you can get by making click here Procesing and here Arduino.
- After that you must uncompress then and put them on a folder (yeah you don't even have to install them, they're that good!), in my case I located them at a special folder I got where I store my applications for use and modifying located at \home\arthur\Programs.
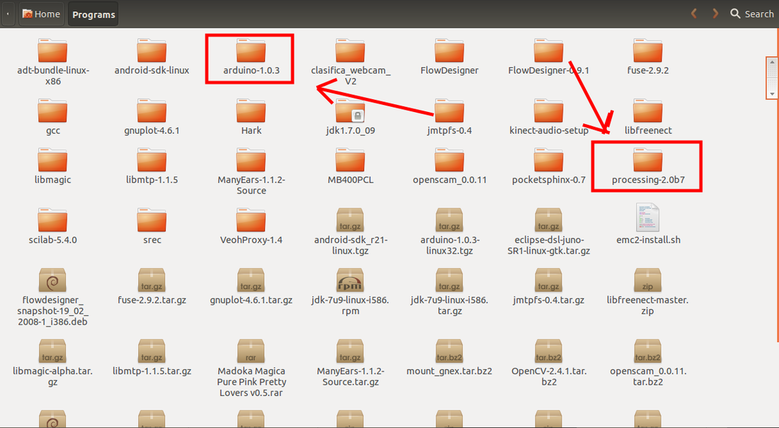
Figure 3. My Program's folder.
- Then you need to install the Arduino library on Processing, which will enable it to upload the necessary firmware to communicate with the Arduino, but here's a catch, the library is no longer compatible with Processing v2 as it was designed for the 1.5.0 version. In the meantime someone can find a solution or develop a replacement (if ever) here's this user modified version of the software which you can download from here. Or if you are to lazy to go change pages, I leave the file here for ya (2013-02-02, no guarantee it hasn't changed pal!):
|
| ||
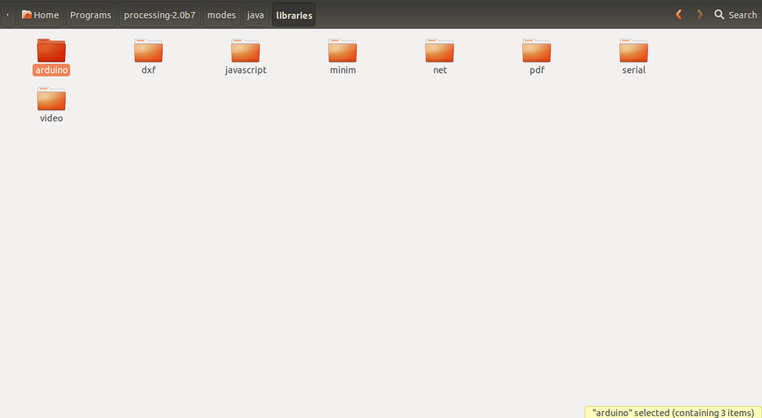
Figure 4. You put the folder in there and it will be recognized, finally!
- Once that is done, you must open the Arduino application. You can do so either from terminal by executing the script ./arduino on the arduino folder or by double clicking the script and working from there. It must show you the following GUI:
$ ./arduino
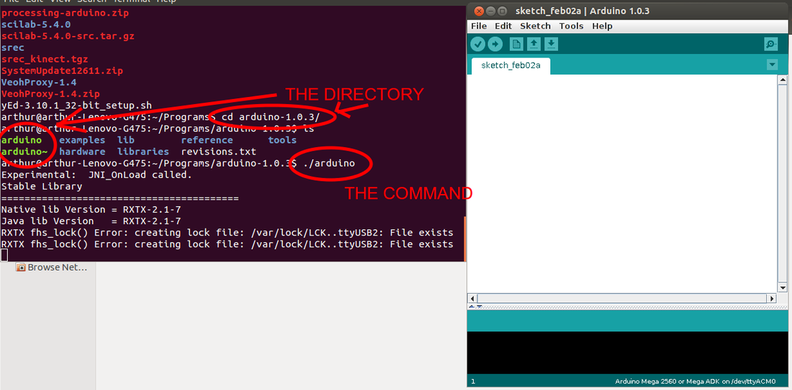
Figure 5. On how to execute the Arduino software, easy huh?
|
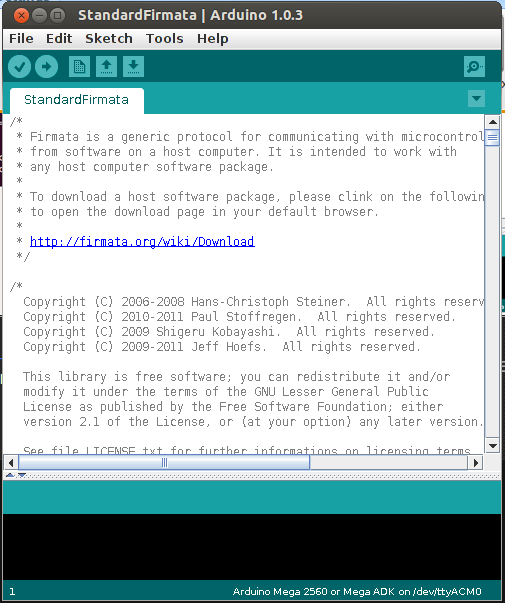
Figure 6. The Arduino GUI. Pretty neat!
|
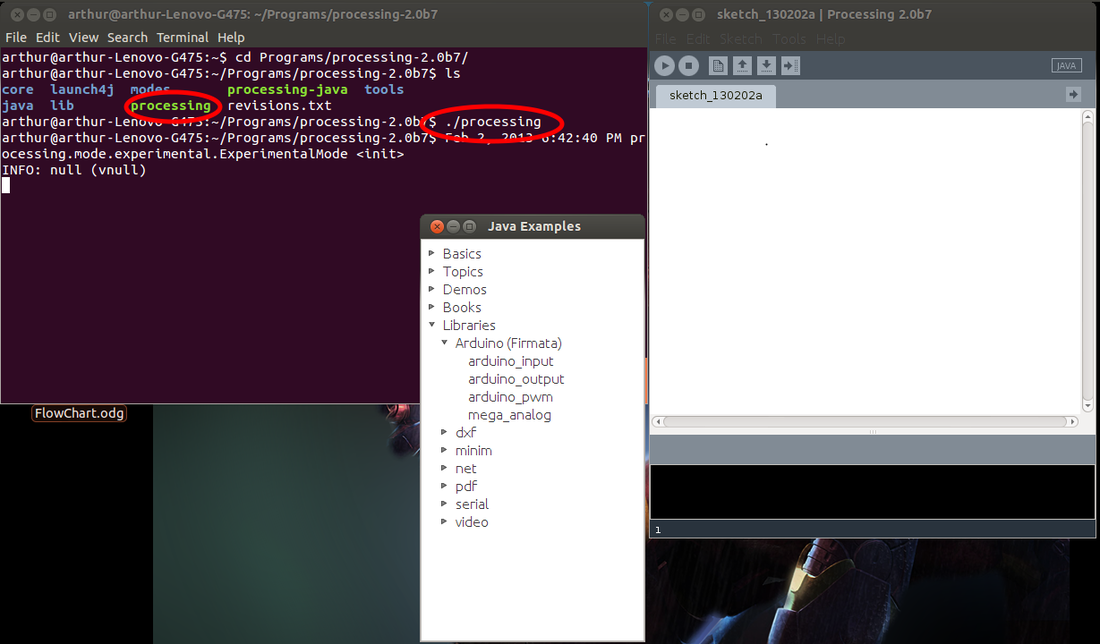
Figure 7. The Processing GUI which is very similar to the Arduino's.
- Plug your Arduino to the USB port if you haven't already and execute the Processing application by clicking on the Run button (once again the arrow like button that points to the right). It should show you the following GUI (figure 9) and if you press on the first button to the left the LED13 on your Arduino (it doesn't seem to matter whether its UNO or Mega as I ran the program perfectly on an Arduino Mega2560) should light up. Click again and it lights off, neat huh? And that's how we've set our control protocol!
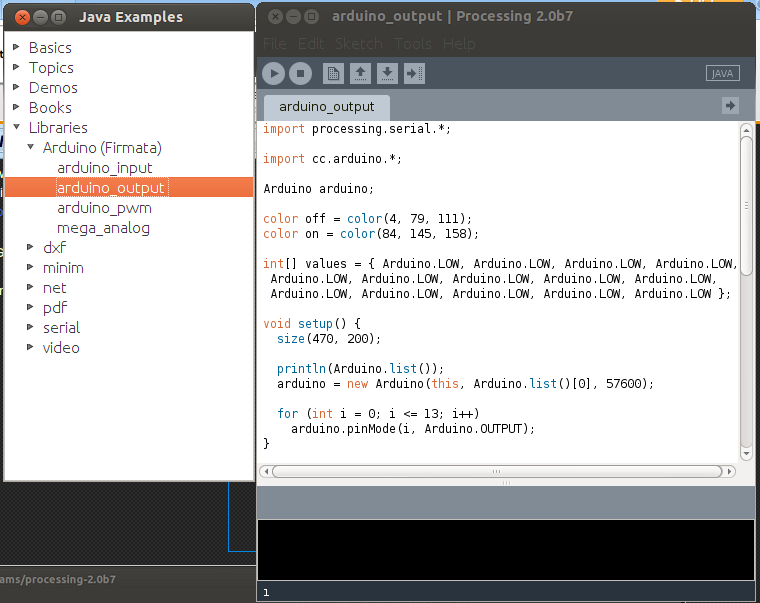
Figure 8. The arduino_output application where we'll make the test.
|

Figure 8. Processing and Arduino in action.
|
And here's a video of the application in action!
Troubleshooting.
Installing the Arduino on Ubuntu.
If you like me had troubles getting the Arduino IDE to work on Ubuntu Linux (my version's 12.10) , here's what worked for me:
Also use dmesg and see what's the Arduino device location, mine's ttyACM0. Write it as you will need it to alter the write/read permissions using:
$ sudo chmod a+rw /dev/ttyACM0
Source: http://blog.markloiseau.com/2012/05/install-arduino-ubuntu/
If you like me had troubles getting the Arduino IDE to work on Ubuntu Linux (my version's 12.10) , here's what worked for me:
- If the Serial Port function on the Tools menu appears grayed out, you won't be able to upload ANY application to your Arduino. It's usually because you aren't part of the USB dialoutgroup or because you don't have write/read permissions over the port. I used the following commands to solve it:
Also use dmesg and see what's the Arduino device location, mine's ttyACM0. Write it as you will need it to alter the write/read permissions using:
$ sudo chmod a+rw /dev/ttyACM0
Source: http://blog.markloiseau.com/2012/05/install-arduino-ubuntu/
