Live2D
Live2D is a recent technology that is based on Japan's animation style that allows designers to create reactive 2D models that act like 3D elements which can be embedded in videogames or other graphical applications. An example of this type of application is the Katou Megumi alarm app which shows a character, in this case Katou Megumi from the Saenai Heroine no Sodatekata anime and can respond to user interaction through the touch screen.
Overall I'm still unsure on what can be done with this technology besides eye candy such as more responsive interfaces that can provide more natural feedback (artificial avatars and the like) but given the progress we're seeing on Artificial Reality it might actually be useful in the future.
For now I hacked the Katou Megumi app from the released beta and used the images to create my own Live2D model to play around with. Made a simple tamagotchi like game just for the lolz and replicated the progress with 2 other characters.
Installing and Running Live2D Cubism Modeler
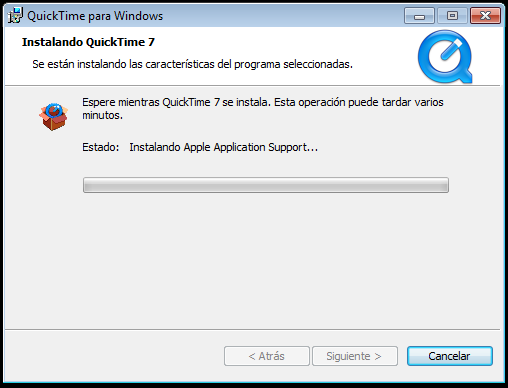
Sadly Live2D only runs on Windows and Mac OS. As such I decided to run it using a Virtual Machine, in my case VirtualBox. Live2D requires QuickTime 7.7 to run so first download the application and install it. If you can't find QuickTime 7 as they have dropped Windows support (figures...), you can download it from HERE.
In the case of the virtual machine its also important to run OpenGL 2+, preferably 3+. To do so in the VirtualBox one must
Creating the PSD file with The Gimp
Basically the first prerequisite to making a Live2D project is a set of images of the model you want to animate. If you're an artist and/or know digital design then you can make your own drawings of the character you want to animate and import it on the project. In my case as I don't know enough about digital design yet, decided to hack the Megumi beta APK and got the file that's shown here:
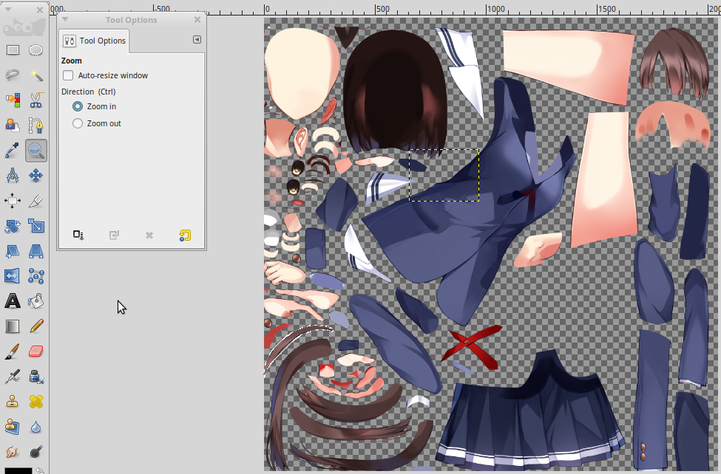
Making use of the Paths tool I cropped each and every one of the elements and assembled the figure as shown. You will typically want several different expressions and each element in a different layer. Once you have each element in a different layer, you must make all the layers visible and save the file as a .psd file (format used by Photo Shop).
Open the Live2D Cubism Modeler editor. In my case I had to run it using a Windows 7 virtual machine using VirtualBox.
I use the + and - keys to zoom in and out of the picture when the path tool is selected and the mouse's wheel down to move across it.
Open the Live2D Cubism Modeler editor. In my case I had to run it using a Windows 7 virtual machine using VirtualBox.
I use the + and - keys to zoom in and out of the picture when the path tool is selected and the mouse's wheel down to move across it.
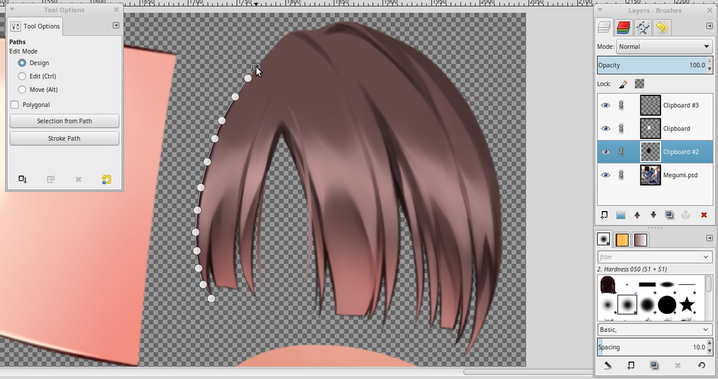
1.-Zoom into the aspect of the image we want to crop.
2.-Select the Paths Tool and start outlining the borders.
3.-Click on the Selection from Path option in the Tools Options window.
4.-CTRL+C to copy the image. We want to make sure we're on the layer where the image is located, in my case its called Megumi.psd
5.-Right click and select the option Paste As -> New Layer.
This will create us a new image layer in which we can work. We position the image where it must be located in the final model.
Import .PSD file into Live2D Cubism Modeler
In order to import the design into Live2D Modeler, its only necessary to put the .psd file into a folder you can reach and drag and drop into the opened interface of the Modeler application.

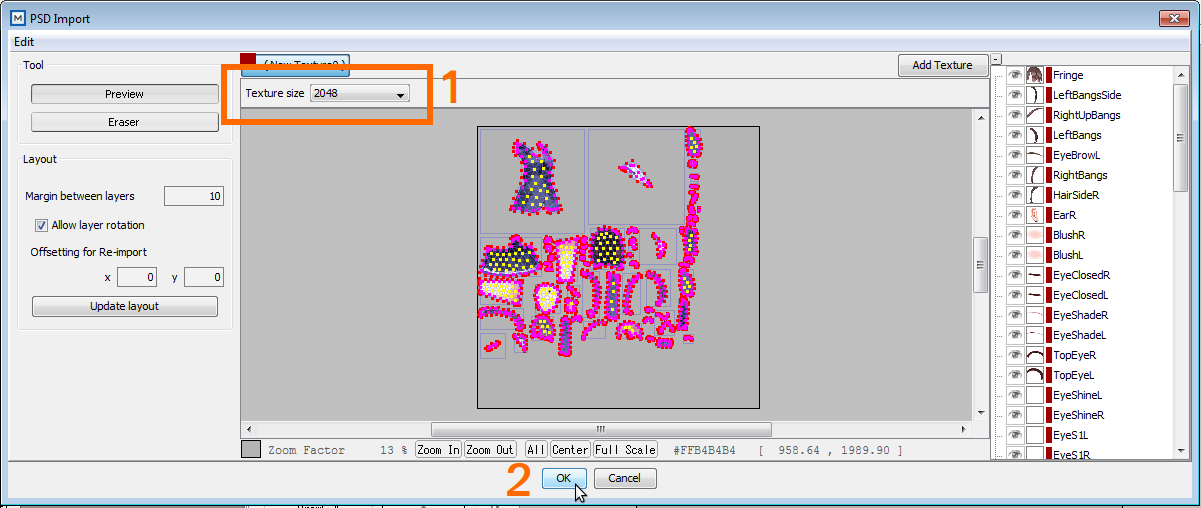
Afterwards the application will display a new window with all the elements displaced in the workspace. It may take some time before the model loads in the window, wait until all parts have finished loading. If there isn't enough space, its possible to reconfigure it on (1) although its highly recommended to instead lower the size of the files using Gimp before loading again as a big workspace will end generating a very heavy model that will consume more resources.
Its desirable that there's a certain amount of space left in the screen as shown and that texture size remains around 2048 or less.
Once finished press OK (2) to continue.
Its desirable that there's a certain amount of space left in the screen as shown and that texture size remains around 2048 or less.
Once finished press OK (2) to continue.
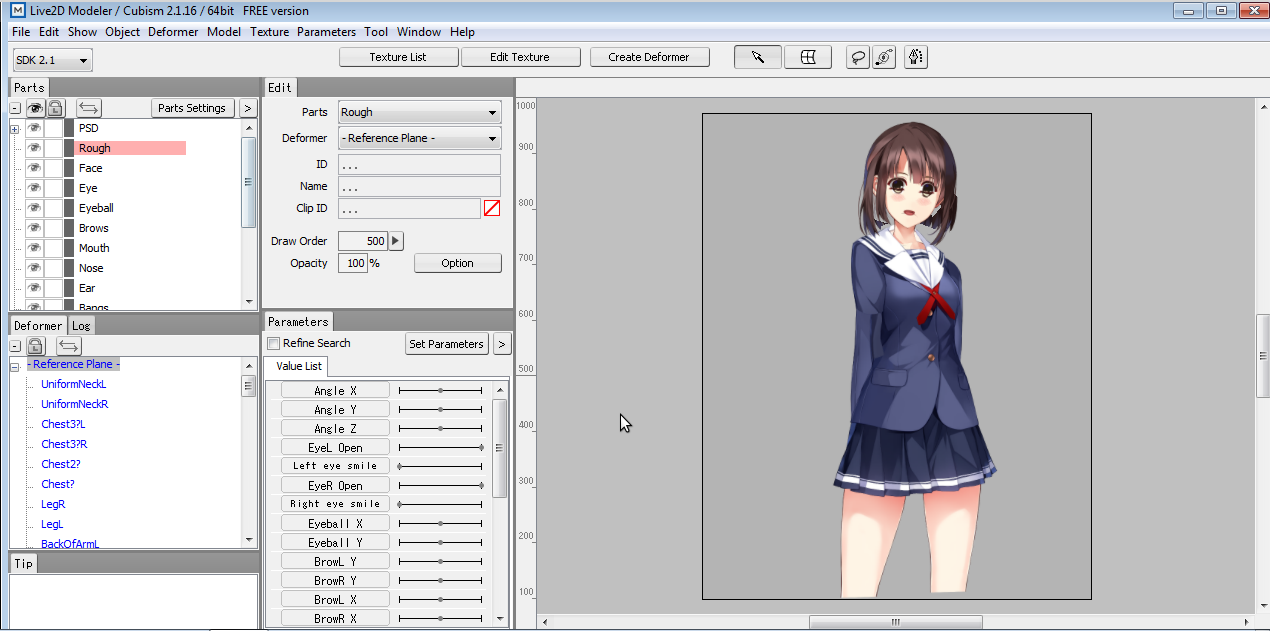
The application will then proceed to pack the model and reassemble it as shown. And now we're ready to start the animation process.
Applying the Deformers
In order to build the animation one must group each of the elements uploaded into the appropriate folders. The application provides folders for each element of the face and a folder for the body and background. In order to group them, one must click and drag the object to the desired folder.
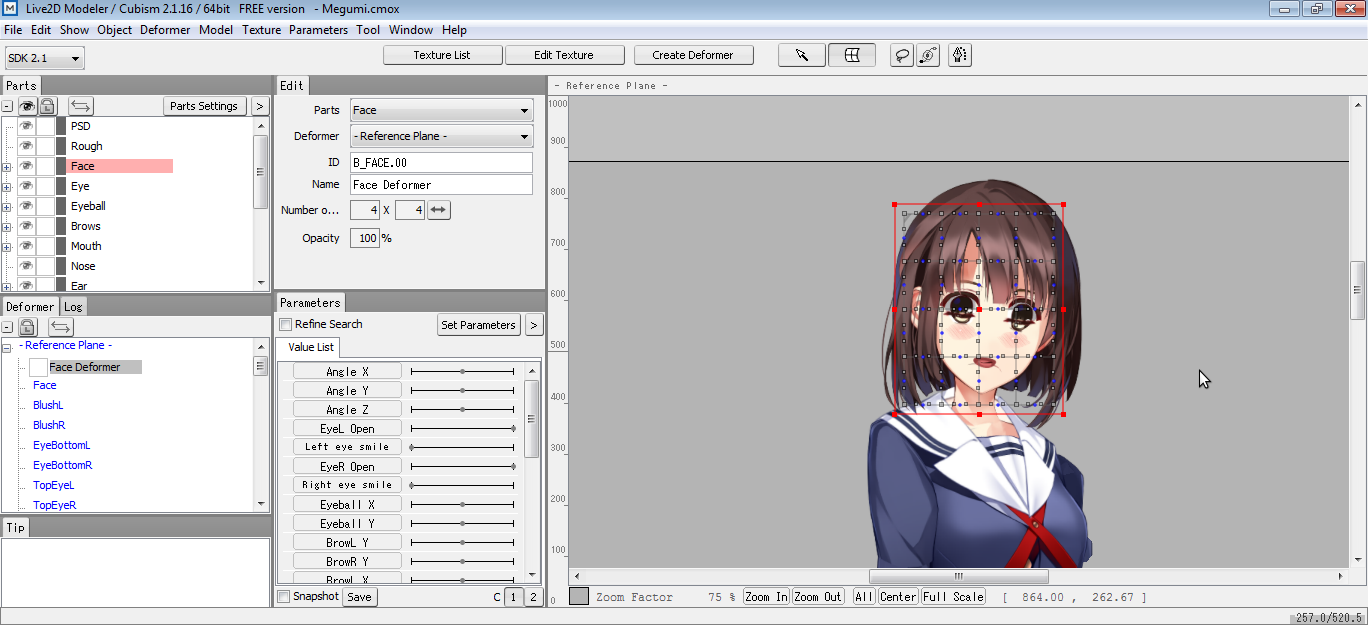
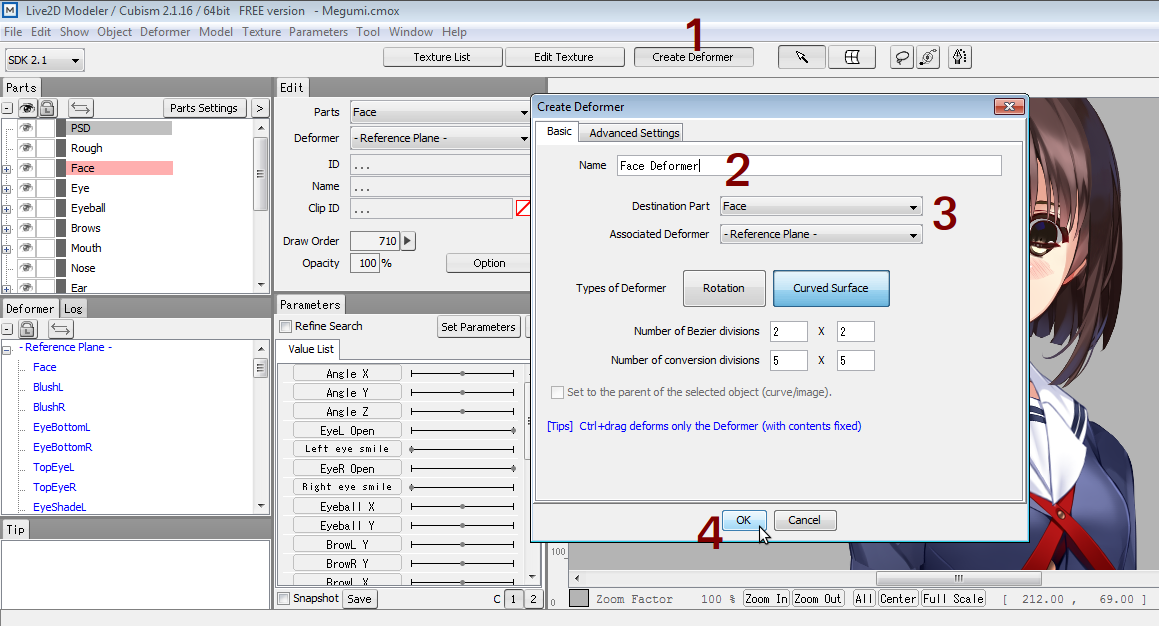
Next comes applying the deformers that will represent each section's animation areas. First click on the button Create Deformer which will open a new window.
Next give the deformer a name. In this case we are making a deformer for the face so we call it Face Deformer. It will ask the destination part and we will select the Face folder (hence why its important to group them).
There are 2 types of deformers:
* Rotation
* Curved Surface
In our case we select Curved Surface. The number of divisions should be the same number, it can be something like 4x4 or left as default. These represent the number of polygons it will generate.
Finally we press OK to apply the deformer.
Using the arrow keys, we move the deformer to roughly cover the area we want to apply it to. In this case the face.