Improving Looks and Feel with OnsenUI

I mentioned earlier how Apache Cordova is really good at making simple applications and test code but just isn't capable of creating animations as well as native apps. Well, it seems things are changing and fast for the hybrid app environments.
OnsenUI is an alternative created to satisfy this need for responsive and interactive controls. This framework provides a set of controls that facilitate app creation, giving them a native feel while simplifying what otherwise would be a painstaking process if we tried to build them using javascript and CSS.
OnsenUI is an alternative created to satisfy this need for responsive and interactive controls. This framework provides a set of controls that facilitate app creation, giving them a native feel while simplifying what otherwise would be a painstaking process if we tried to build them using javascript and CSS.
Using Monaca
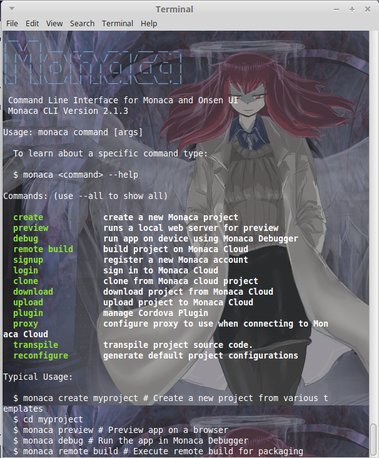
As it usually happens with web technologies (and desktop too as we approach the singularity) packages get updated, modified and inevitably broken. OnsenUI 2 has been released and its different from the old version, this one can be compiled through Monaca which is a cloud based framework for web development. Its very similar in syntax and compatible with Apache Cordova and can be installed using the npm package manager
$ sudo npm install -g monaca
NOTE: Make sure npm and nodejs are the latest versions and that you don't have older versions running in your machine. I made the mistake of keeping the nodejs-legacy version in mine and npm kept causing conflicts because monaca needed a higher version and couldn't find it.
The application once installed requires you to create an account at the website with a password and to login to it. You can use your GitHub account to automatically link your projects which makes updating, keeping track and adding them to the CV a lot easier.
Now onto creating a project, we use
$ monaca create <PROJECT_NAME>
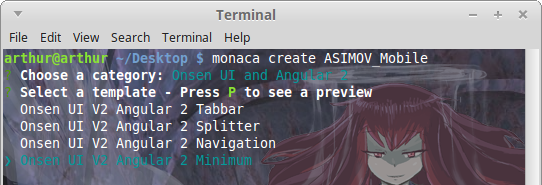
The application will ask for a framework to use. In this case we're going to add Angular2 because of the features it provides.

Next it will ask if we want to use a template. Templates are pieces of premade code that we can use to save ourselves the hassle of configuring everything. In this case we make use of the minimal template so that we can add what we need from the ground up (since it will be a simple app too).
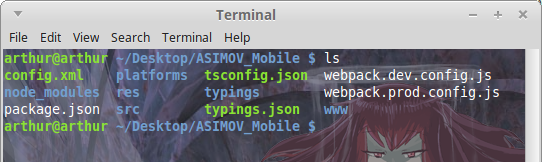
Entering the project we can see that its very similar to Apache Cordova. It also contains a www folder where the magic happens.
Run Monaca App in Local Android Device
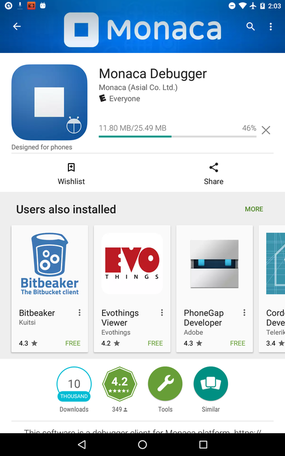
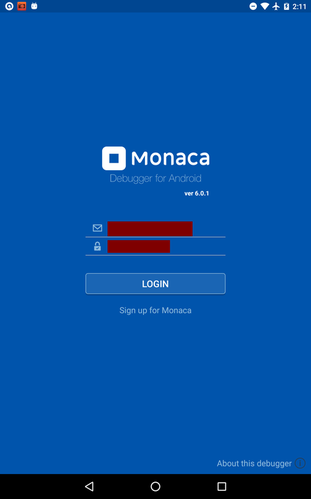
In order to execute the app in Android for testing, we must install the monaca debugger app in our Android device.
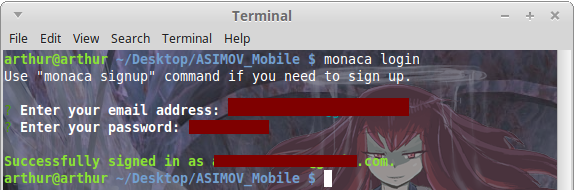
Make sure you are logged in to your monaca application or login:
$ monaca login
$ monaca login
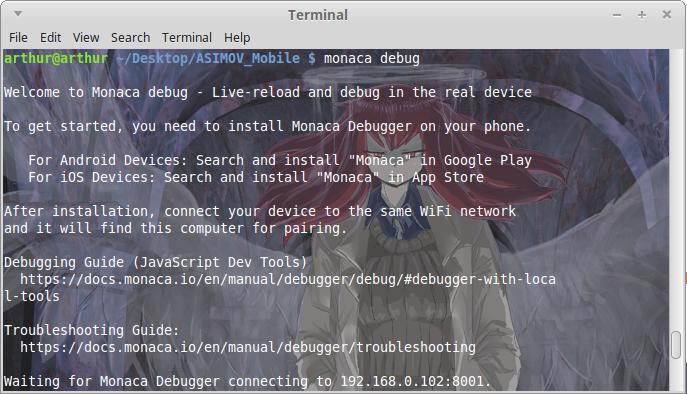
Now its time to link your PC with the device. Use the debugger tool
$ monaca debug
$ monaca debug
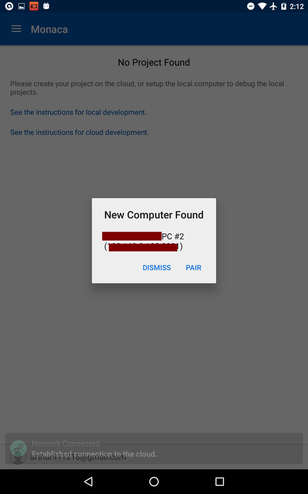
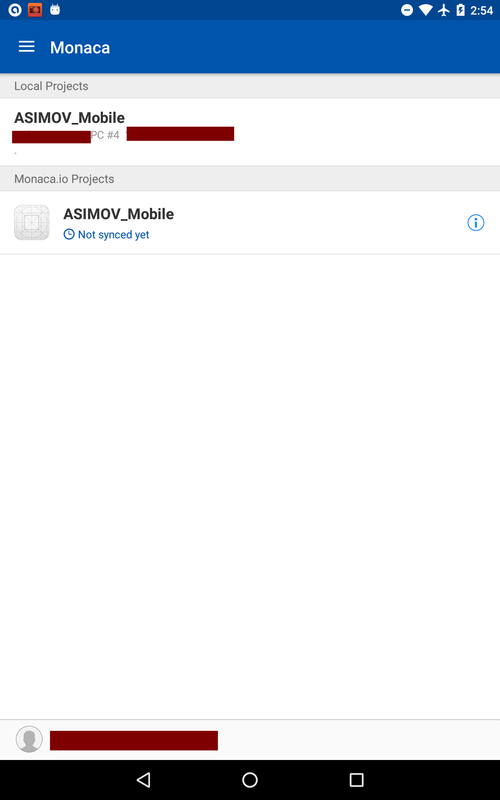
Now login into Monaca App in your Android device. You'll get a message asking if you want to pair with the pc after which your PC identifier should appear. Select Pair.
|
|
Afterwards you will see your project on the Monaca debugger App. If you don't, swipe down or go to Local Projects and reattempt pairing. Another option is to try disabling firewalls on port 8001 or setting another port to pair with your PC.
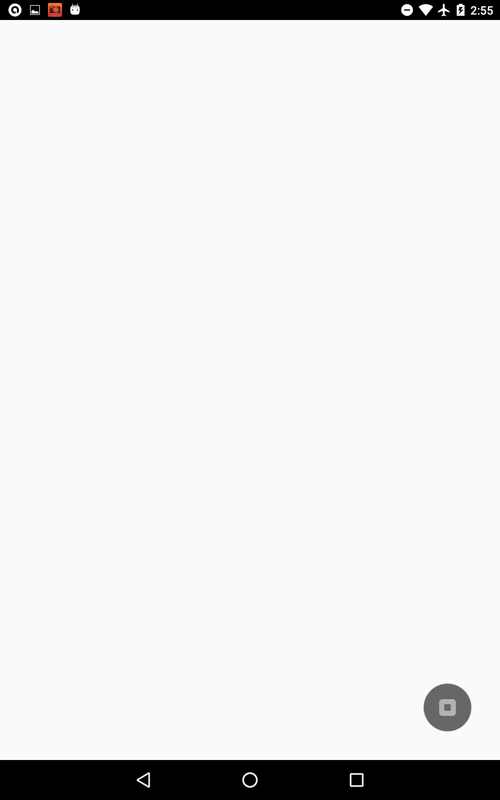
Clicking on the project will initialize it on your App and you'll be able to see a blank canvas where we'll set our controls.
Clicking on the project will initialize it on your App and you'll be able to see a blank canvas where we'll set our controls.
|
|
Now its time to code!
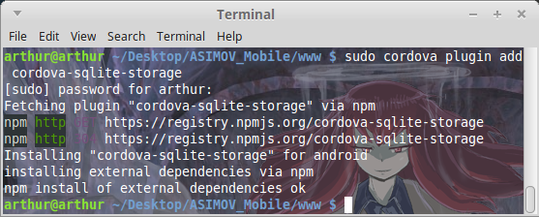
Installing OnsenUI (OBSOLETE 2016-10-02)
Install NodeJS and NPM
First of all install the prerequisites. NodeJS is downloaded from the official page and decompressed.
Next proceed to add the path to your .bashrc file so that it can be accessed in console from any point in the system.
Similarly npm can be installed using the terminal
$ sudo apt-get install npm
Similarly npm can be installed using the terminal
$ sudo apt-get install npm
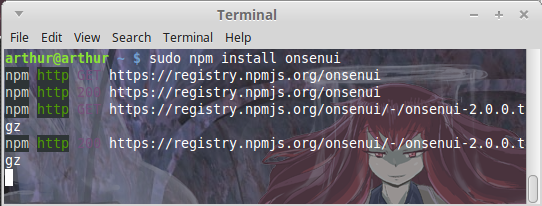
Install OnsenUI
Use Node Package Manager (NPM) to install OnsenUI.
[1] http://thejackalofjavascript.com/onsen-ui-and-phonegap-getting-started/
[2] https://www.sitepoint.com/onsen-ui-answer-cordova-ui-development/
[3] http://monaca.mobi/en/blog/lets-make-a-phonegap-app-with-angularjs-onsen-ui/
[4] https://docs.monaca.io/en/quick_start/cli/
[2] https://www.sitepoint.com/onsen-ui-answer-cordova-ui-development/
[3] http://monaca.mobi/en/blog/lets-make-a-phonegap-app-with-angularjs-onsen-ui/
[4] https://docs.monaca.io/en/quick_start/cli/
