1. User profiling system.
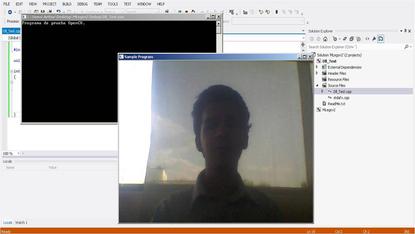
Figure 1. Just me doing my thing...
One of the most important tasks that I want the system to be able to do is profile matching of every individual patient; a process that usually takes a lot of time to be done in my country, time that a sick patient can't afford to lose...
As such the idea is to enable the system to automatically create a profile for every new patient on their first visit and index their medical information during every session as references for the medical staff and enable the creation of histograms and charts to get a better grasp of their condition and improvements (or degeneration) over time.
In order to do that, I've chosen to make use of the OpenCV library for computer vision because its really well documented and is a high level library with lots of useful functions that let me create vision applications quickly.
Also, my project's head has tasked me with using LabVIEW as the primary control language and so, even though I'm reticent of using proprietary and closed applications I'll comply.
1.1 Installing OpenCV on Windows.

Figure 2. OpenCV logo.
Just as I feared, installing OpenCV in Windows 7 was a headache compared to installing and configuring it on Ubuntu Linux, still, it was necessary to compile the codes because otherwise I would have needed to go to Linux and then back to link them in LabVIEW and that was unacceptable.
So here's the guide to installing and running OpenCV on Windows 7 32 bits and running a simple example on Microsoft Visual Studio 2012:
So here's the guide to installing and running OpenCV on Windows 7 32 bits and running a simple example on Microsoft Visual Studio 2012:
Additional Notes:
Despite all the previous information in some computers the installation has failed, specially on those of 64 bits. What I'v done then is to delete ALL previous OpenCV files so that they don't disrupt the installation path and copy the .dll files to both System and System32.
|
Use this code to check if your OpenCV install is correct. If it is, you should be able to see your camera on the screen.
Taken from: http://opencv-srf.blogspot.mx/2011/09/capturing-images-videos.html | ||
|
If you feel too lazy to type the Input as I did, just copy and paste from here.
| ||
1.2. Linking OpenCV with LabVIEW.
1.2.2. Generating the DLL files.
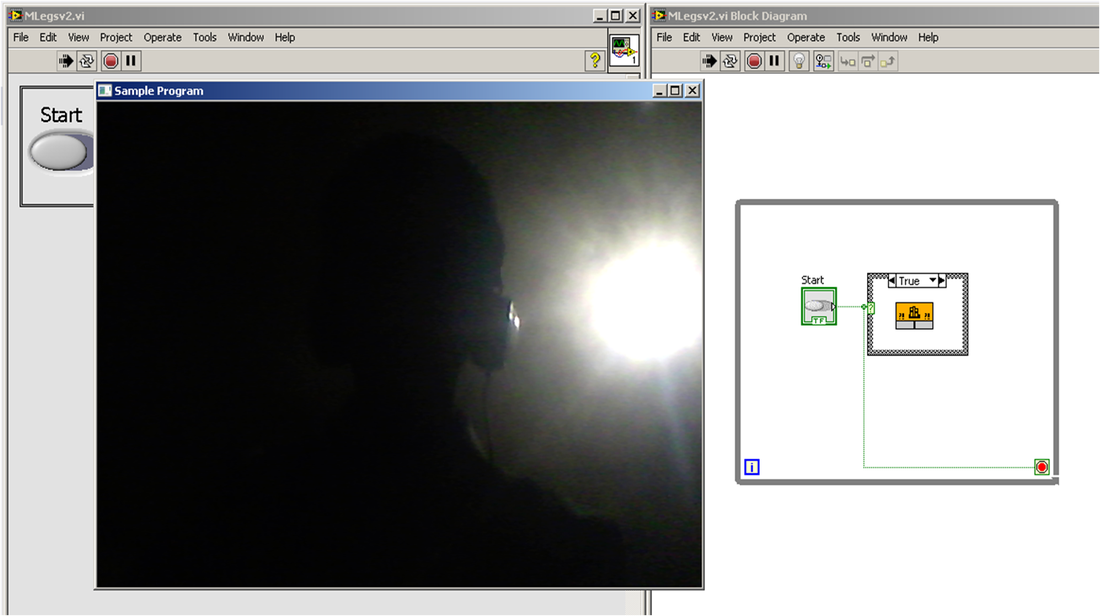
Figure 3. Yeah my camera makes awful shots in the dark...
In order to configure the computer to link my OpenCV application with NI LabVIEW 2012 I needed to create something known as Dynamic Linking Library (DLL) which is a library that gets attached to an application during runtime unlike static libraries that get linked during compilation.
I'm still fairly new to this subject but making some progress on it. On the bottom of this page I've attached the resources from where I got this useful information.
In order to create this application you need:
Now the first step is to generate a new DLL project activating Microsoft's Visual Studio:
I'm still fairly new to this subject but making some progress on it. On the bottom of this page I've attached the resources from where I got this useful information.
In order to create this application you need:
- Visual Studio (here I made use of the 2012 Express Edition which is free).
- LabVIEW (version 2012 here but it shouldn't give much problem from 6.x or more recent).
- OpenCV 2.4.2 (had troubles setting 2.4.5, still need to solve that).
Now the first step is to generate a new DLL project activating Microsoft's Visual Studio:
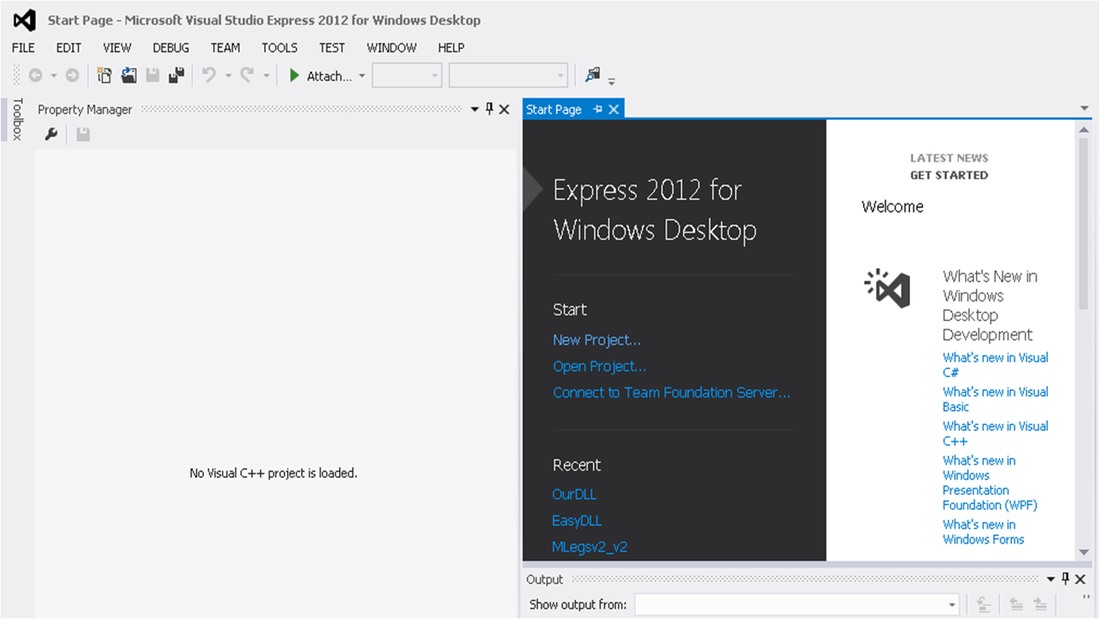
Figure 4. The Visual Studio environment.
Once in the environment one must make click on the New Project option that appears in blue on the image which will open the menu on figure 5. We must give it a new name and press Ok.

Figure 5. Options available. We must choose New Project and give it a name.
Afterwards we click Next (figure 6).
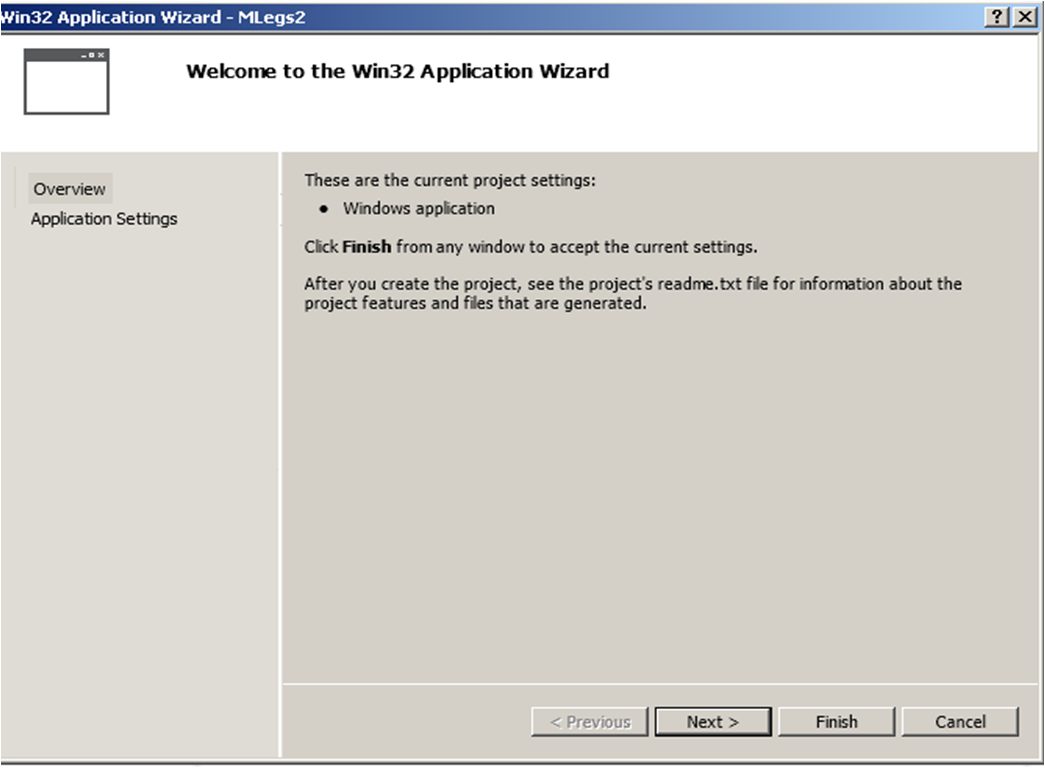
Figure 6. Just press next.
We select on application type the Dynamic Linking Library (DLL) as shown in figure 7.
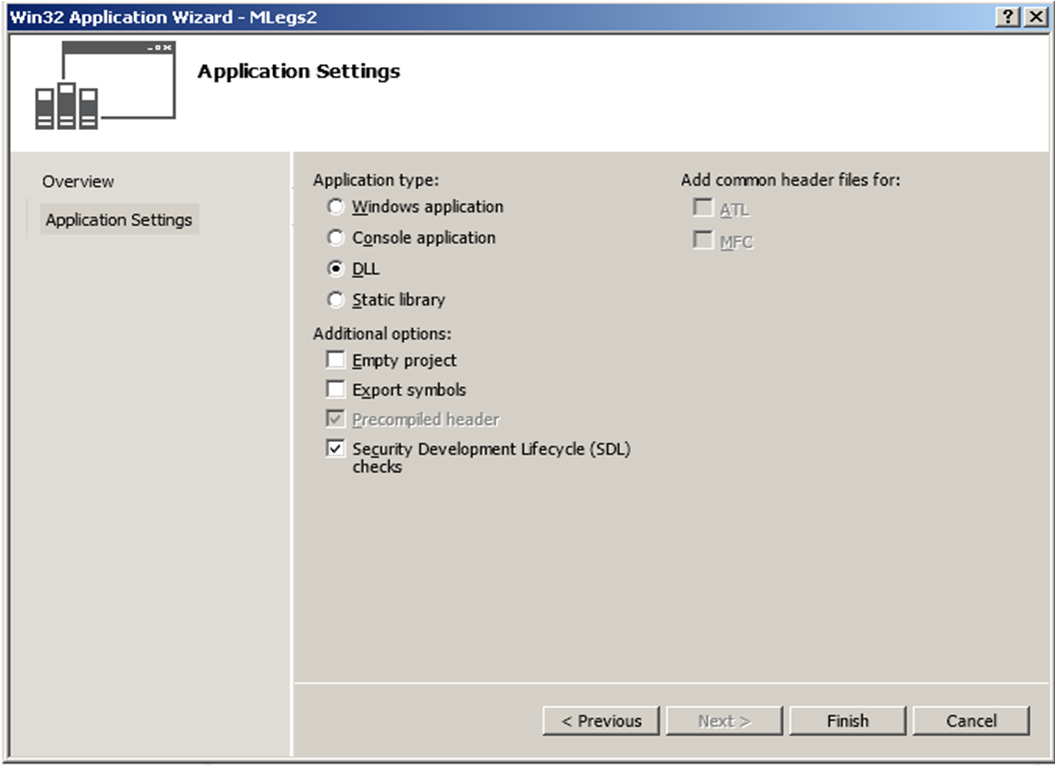
Figure 7. Select DLL on application type.
We'll get the programming interface where we can write our code. But first we need to configure the project so that it recognizes the OpenCV functions. This must be done on every new project we make that makes use of OpenCV. In order to do that we make right click on the project's name in the Property Manager menu and select the Properties option as seen in figure 8.

Figure 8. The programming interface where we introduce the code and modify the project.
In the project properties we can link external libraries and modify the general properties of the project. In this case we need to modify the Compiler and Linker properties to accept OpenCV libraries. First we select the Compiler option in the left menu and make click on Additional Include Directories as shown in figure 9. We select the Edit option.
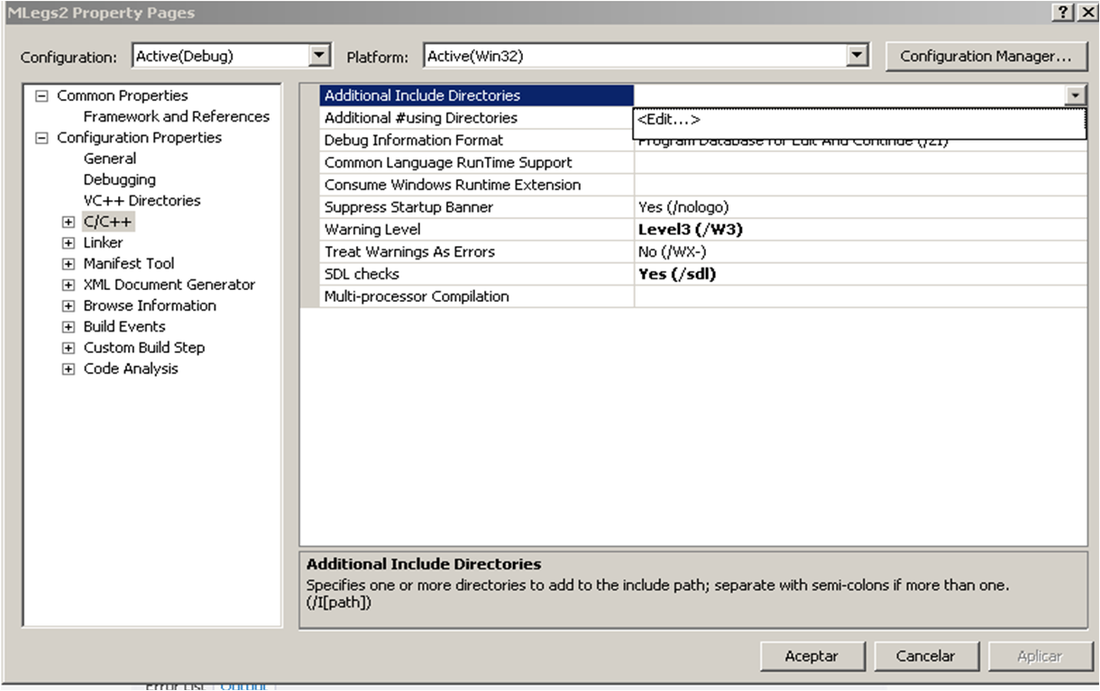
Figure 9. Additional Include Directories lets you include new libraries on your application.
This will open a dialog box where we must add the path to the OpenCV include directory. In my case OpenCV is configured to be in C:/OpenCV/build/include but it changes to where you have placed the OpenCV directory. As show in figure 10. On figure 11 one can see the added path.

Figure 10. The path to the include directories must be added so that the project can recognize the external functions.

Figure 11. Include directories added to the application.
Once the include directories have been added to the application one must continue with the Linker so that the application can compile and link the libraries. In order to do that one goes to the Linker option and selects the Additional Library Directories option from the menu as shown in figure 12. In figure 13 one can see the directory for the additional linker paths.
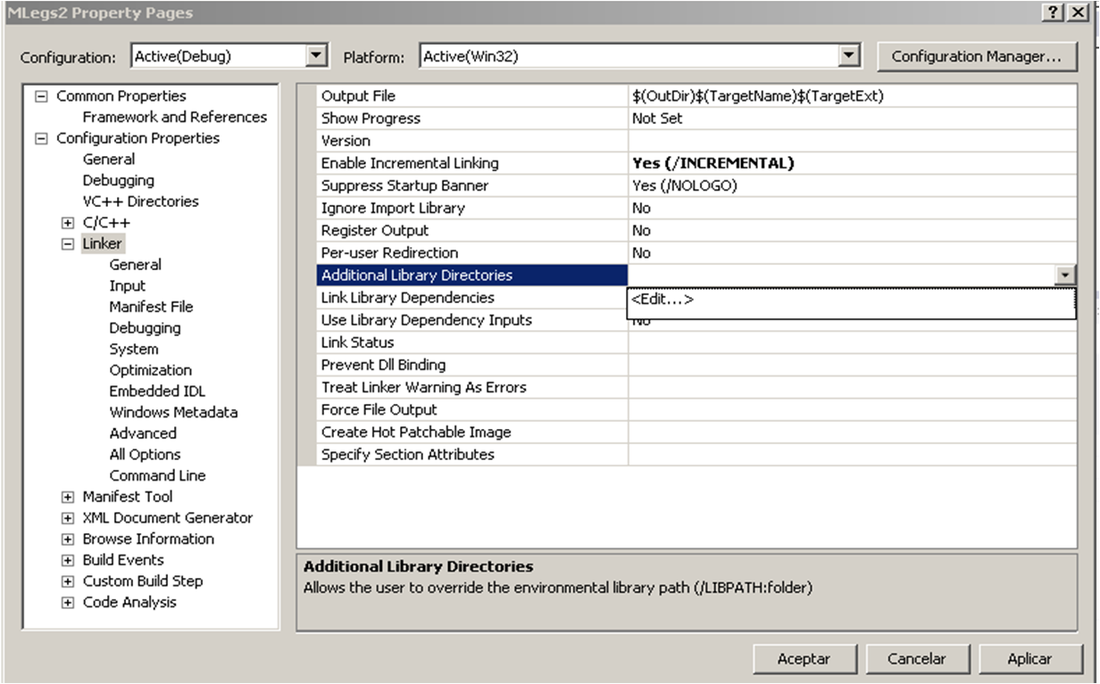
Figure 12. Additional Library Directories configuration.
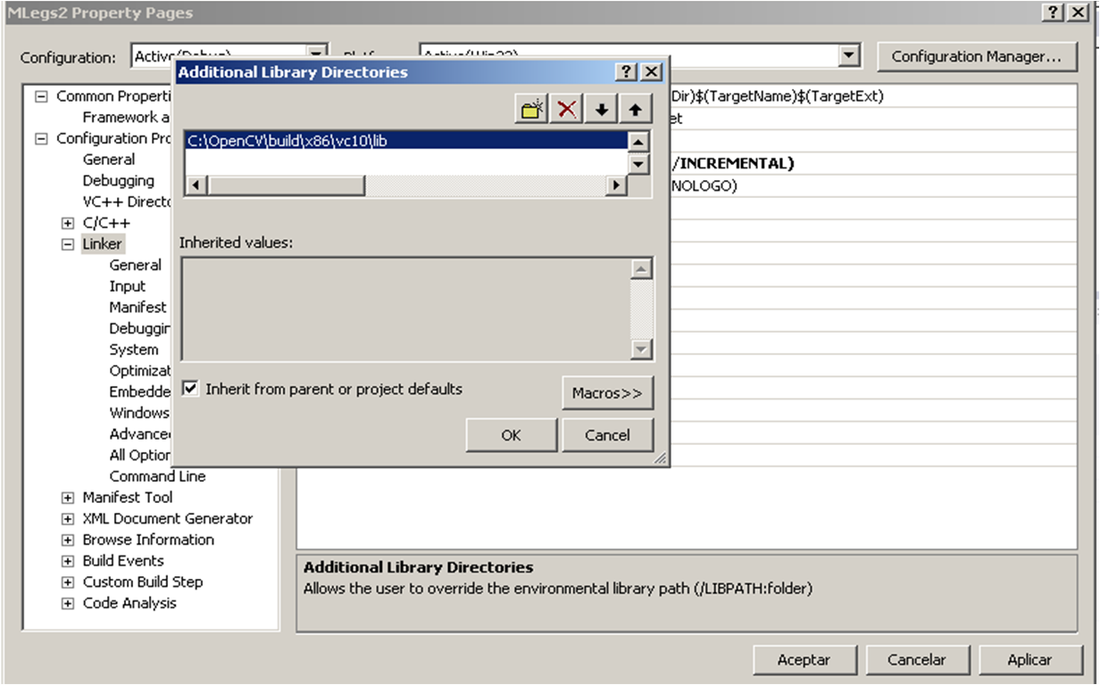
Figure 13. The OpenCV library directory is on C:\OpenCV\build\x86\vc10\lib.
After the libraries path is configured we must select the Input option on the left menu in the Linker option and add the following lines of code so that Visual Studio knows what libraries must it look for:
opencv_core242.lib
opencv_imgproc242.lib
opencv_highgui242.lib
opencv_ml242.lib
opencv_video242.lib
opencv_features2d242.lib
opencv_calib3d242.lib
opencv_objdetect242.lib
opencv_contrib242.lib
opencv_legacy242.lib
opencv_flann242.lib
Its assumed that they can be changed from 242 to the current OpenCV version like 245 although when it was tried Visual couldn't find the libraries even though it was installed. This option can be seen in figure 14 and 15.
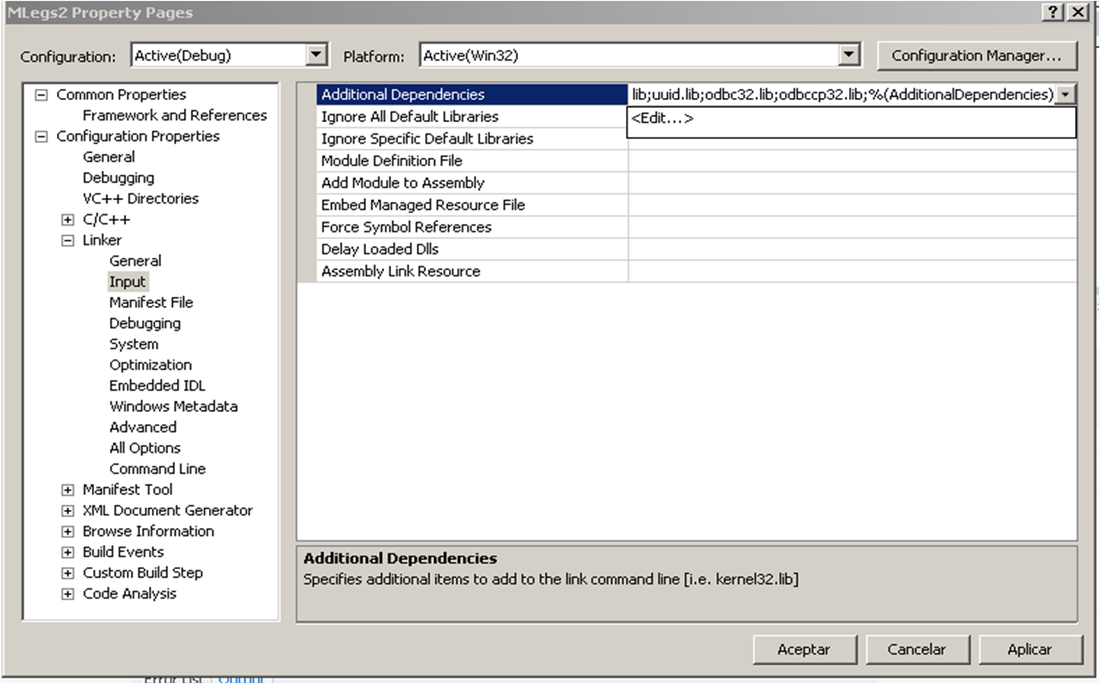
Figure 14. Additional Dependencies instructs Visual Studio exactly what libraries to seek.
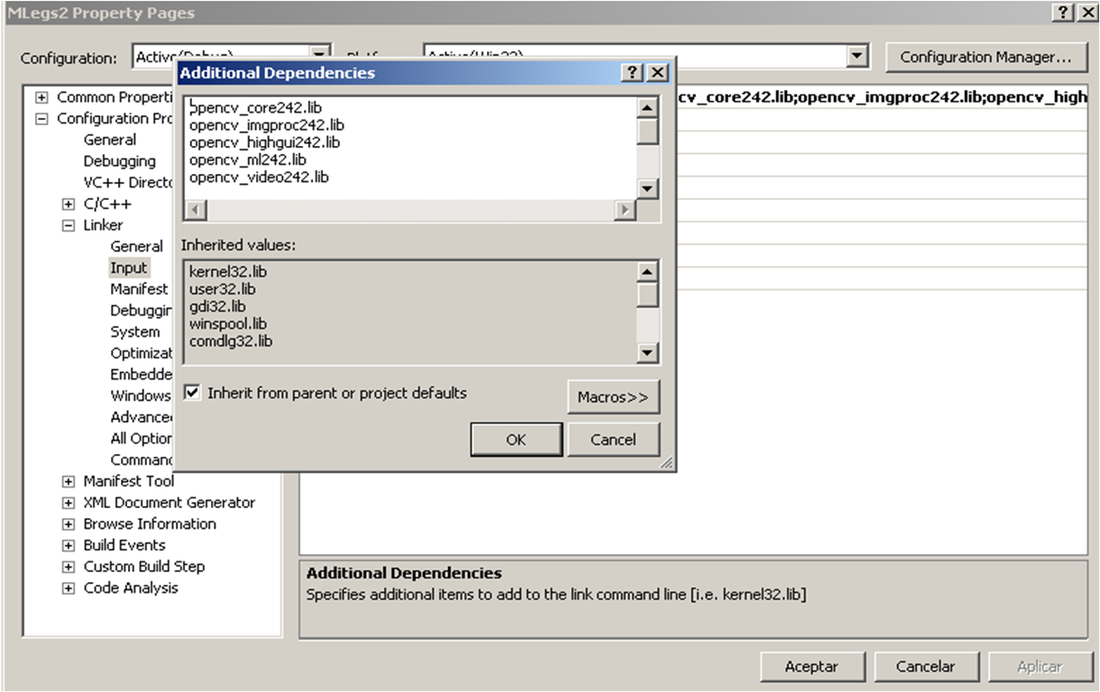
Figure 15. The libraries added. Its only a matter of copying and pasting the libraries shown above.
We then introduce the following code to check if the application works. We don't compile yet because we need to also add a header file to export our functions so that they can be used by other applications and languages (A.K.A. LabVIEW). In figure 16 we show the code that must be introduced.
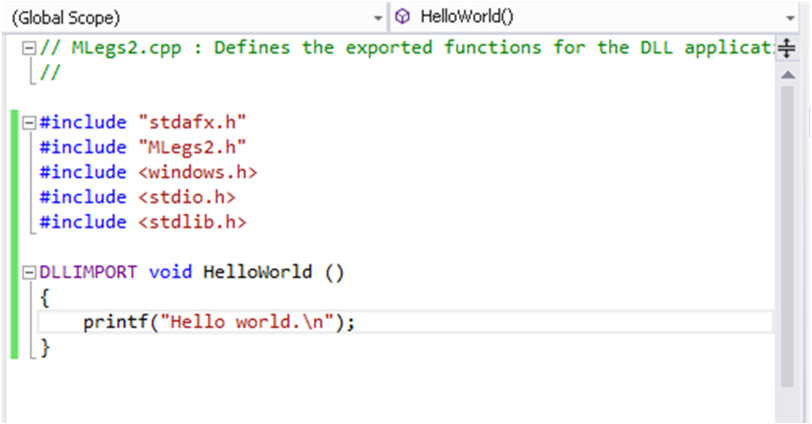
Figure 16. Basic code to check the integrity and functionality of the code.
We then make left click on the Solution Explorer and select Add -> Add New Item in order to create the header file ( .h ) that will be needed to export the functions. In figure 17 we see how to add the new header file.

Figure 17. Adding a new item to the project.
We select Header File as option and give it a name. Finally we make click in the OK button as shown in figure 18.
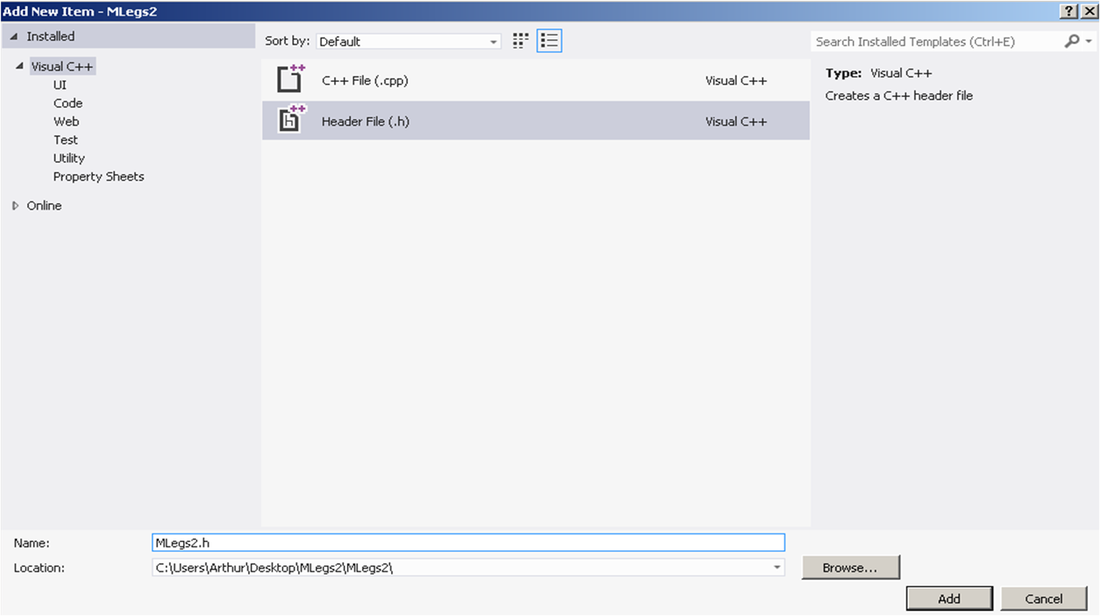
Figure 18. We select to create a new Header file to export the OpenCV functions outside of Visual Studio.
We type the code shown in figure 19 and compile to check for errors. If there are no errors we can continue to the next step.

Figure 19. Code for the header file.
