1.2.3. Linking the DLL with LabVIEW's "Calling Function Node".

Figure 20. NI LabVIEW's logo.
Once the DLL generation is complete with no errors, we proceed to create the link between National Instrument's LabVIEW and the OpenCV code generated on Visual Studio.
In order to link external applications, LabVIEW provides at least three ways to achieve it but in here I'll make use of the "Calling Function Node" block that is the most generic and, in my opinion, useful (besides being the only one that worked for me, heheh).
So we must first have a NI LabVIEW application installed on our computer.
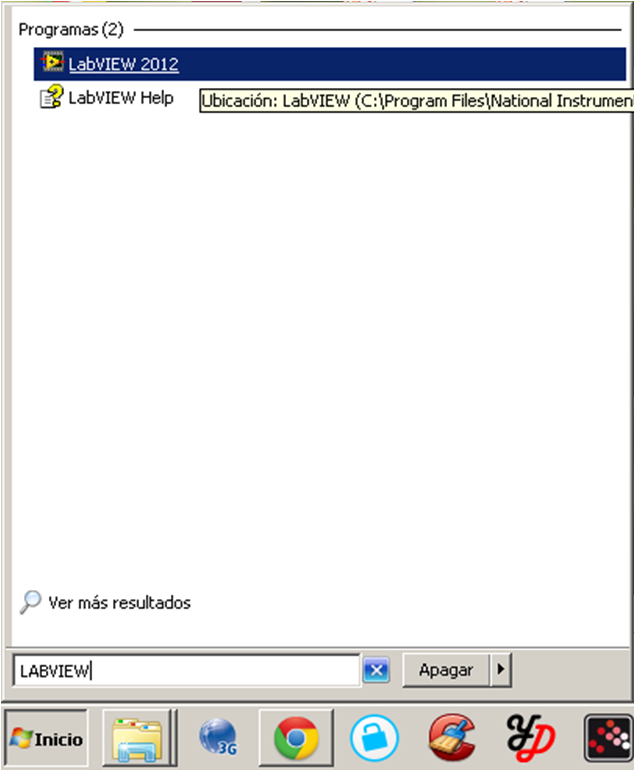
Figure 21. National Instrument's LabVIEW 2012.
|
The first thing to do is start NI LabVIEW for which we go to Start menu and select LabVIEW as shown in figure 21. In this case I have LabVIEW 2012 installed. It will display the logo as shown in figure 22.

Figure 22. LabVIEW's 2012 cool logo.
|
Once LabVIEW starts we'll be presented with the LabVIEW interface. In the earlier versions LabVIEW started the Virtual Instrument option by default but in newer versions it has taken a more modular approach where the designer creates a new project and starts adding, modifying and deleting modules from a single project. This is in some ways slower but also more ordered way to work so I kind of approve of it. In figure 23 we see the menu and select the Create Project button.
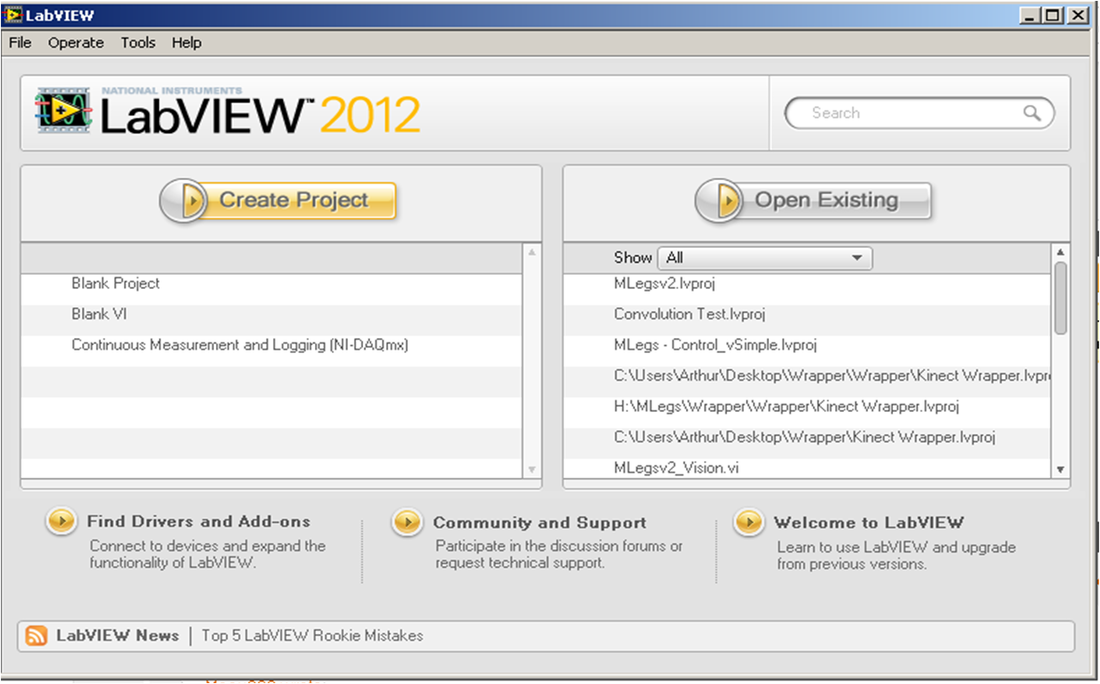
Figure 23. LabVIEW's modular approach to project making.
We select the Blank Project from the Templates as shown in figure 24.
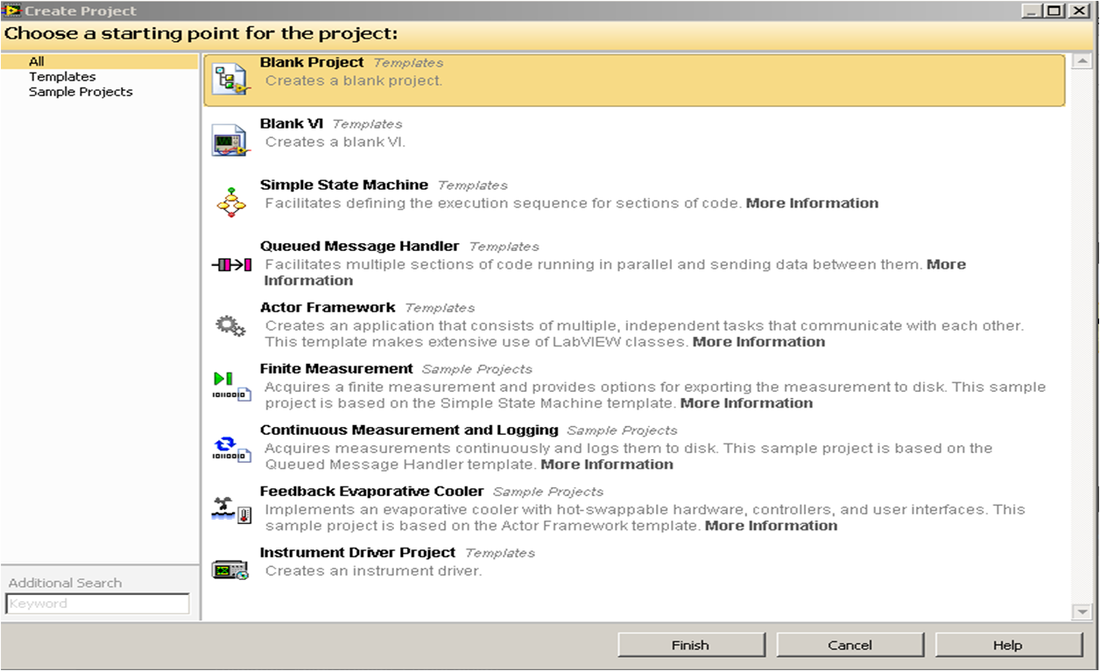
Figure 24. Project Templates for LabVIEW project creation.
As seen in figure 25, doing so will generate the Project Window where we can see and modify the project's modules.
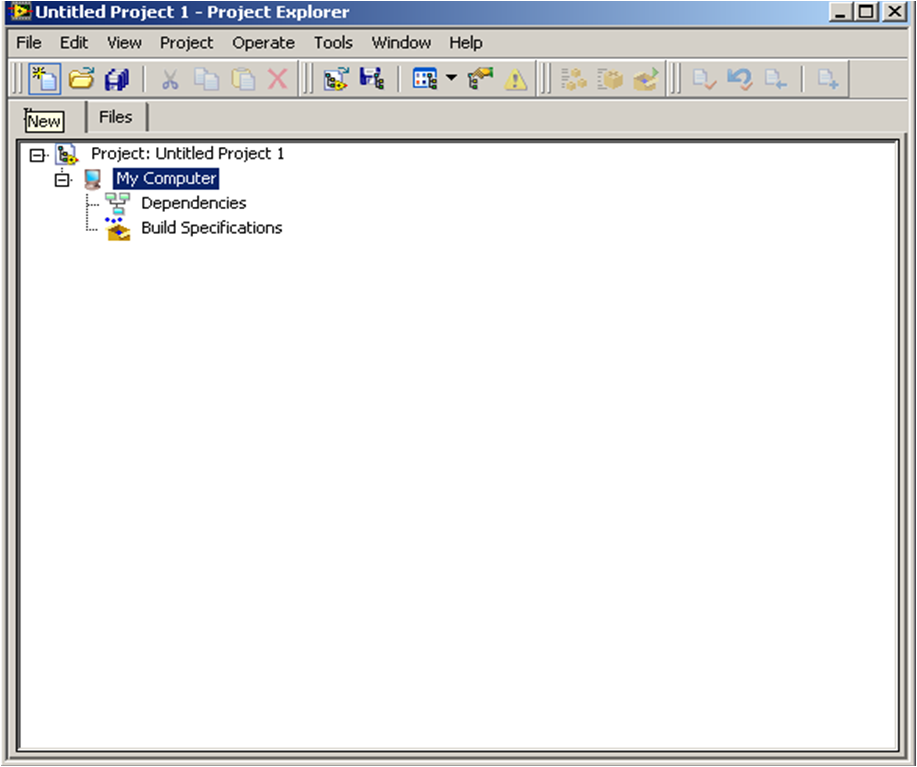
Figure 25. The project explorer where the modules are displayed.
We then make click on the New button on the upper left corner of the Project Explorer which will display the VI options. We select to create a new Blank VI as shown in figure 26.
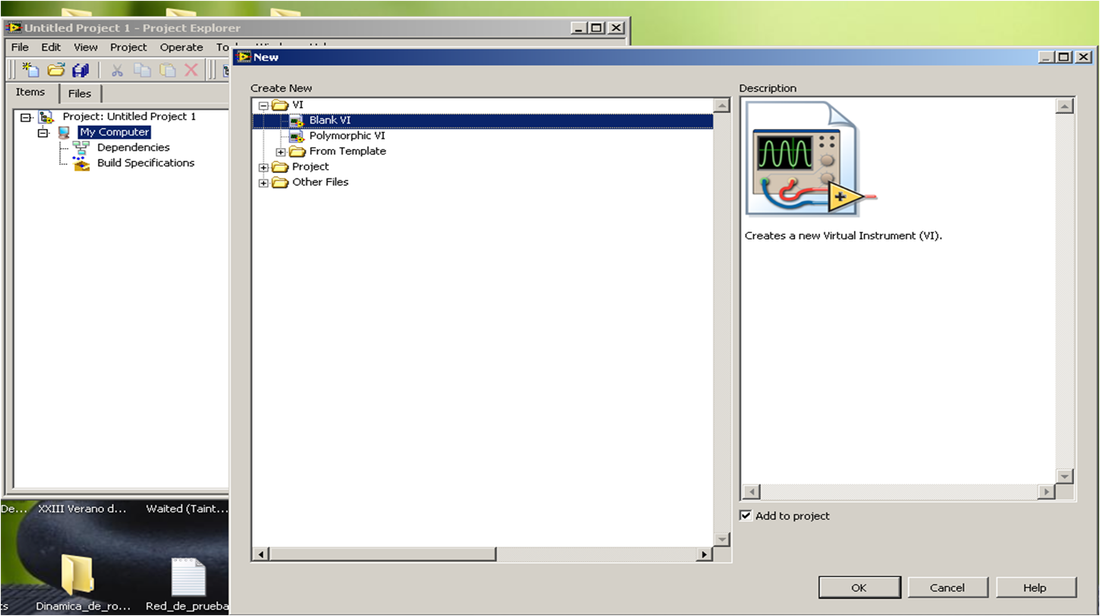
Figure 26. Different VI creation options.
We then add the Library Function Node VI, which is an instrument that enables LabVIEW to call outside functions from other applications (in this case from OpenCV). In order to do that the requisite is that they must be dynamically linked (.dll extension). Its located in the Programming palette in Connectivity -> Libraries & Executables as shown in figure 27.

Figure 27. The location of the Calling Function Node VI.
Making double click on the Calling Function Node displays this VI's menu where we must link exactly the functions we intend to use in our application. The menu can be seen in figure 28.
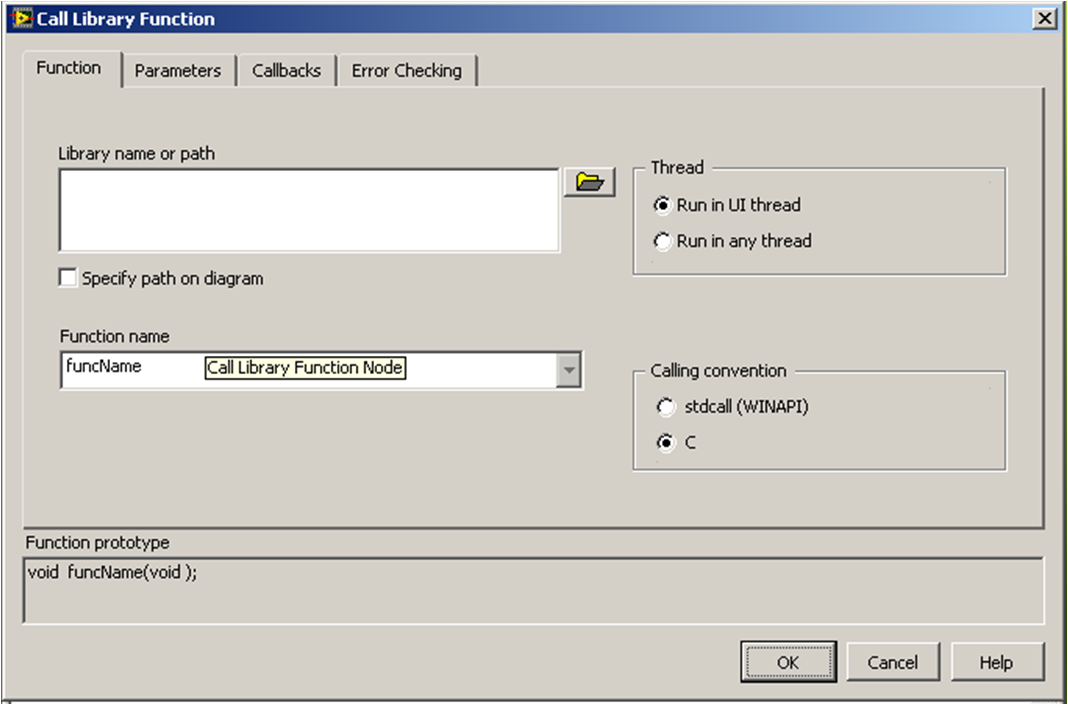
Figure 28. Call Library Function menu where we reference the external libraries and functions.
We make click on the folder icon to add a new DLL to our function, in this case our generated DLL from Visual C / OpenCV. As shown in figure 29 it is located in our Debug folder on the Visual Studio project folder.
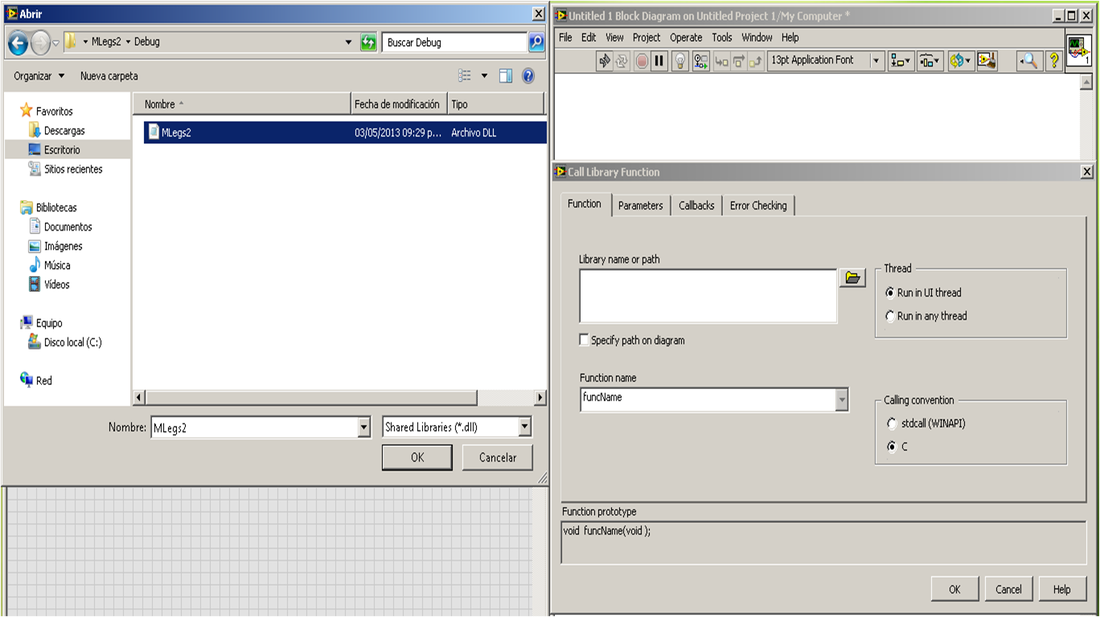
Figure 29. Referencing the generated DLL from our application.
If everything has worked until this point the function HelloWorld which is our programmed function on the DLL must appear in the Funcion name drop down menu as shown in figure 30. We select it and press OK.

Figure 30. Checking if the function appears in the Call Library Function VI.
We're almost finished. We now need to modify the parameters list and check if it returns void by making click on the Parameters label in the Calling Function Node VI. We check if it has void as a return type as shown in figure 31 and rename it void so that it has a shorter name (Optional).
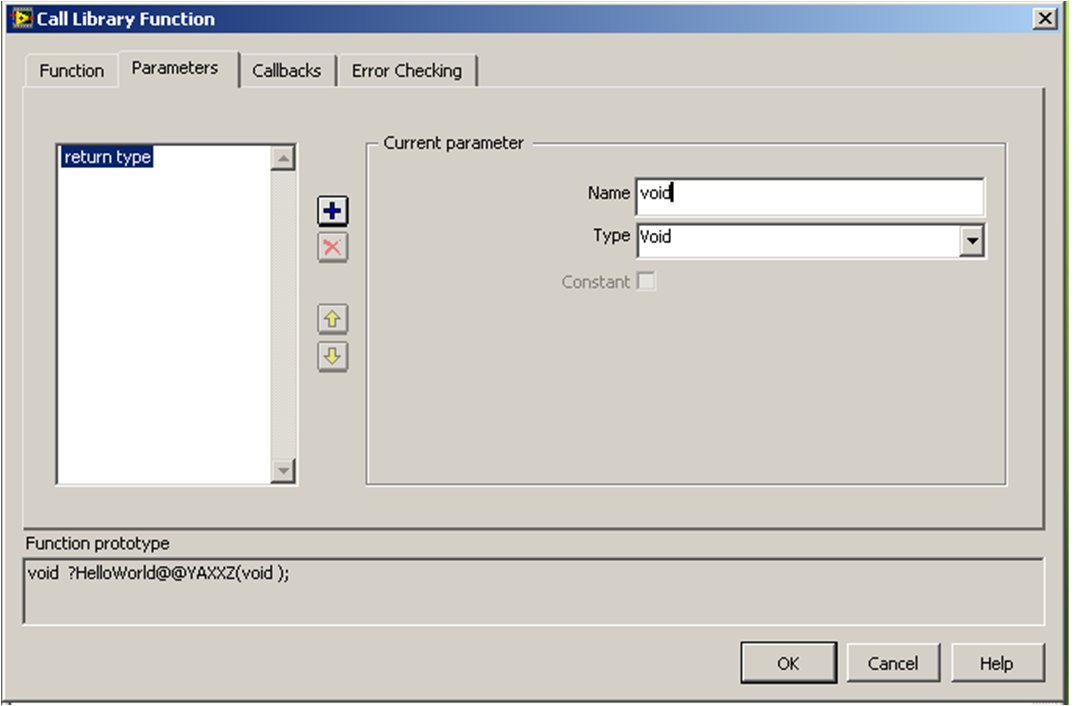
Figure 31. Check if the parameters return a void value as we aren't sending any data outside the DLL.
We add a Start button to the VI and a while loop so that the VI runs indefinitely along with a case structure so that the DLL runs only once the Start button has been pressed as shown in figure 32.
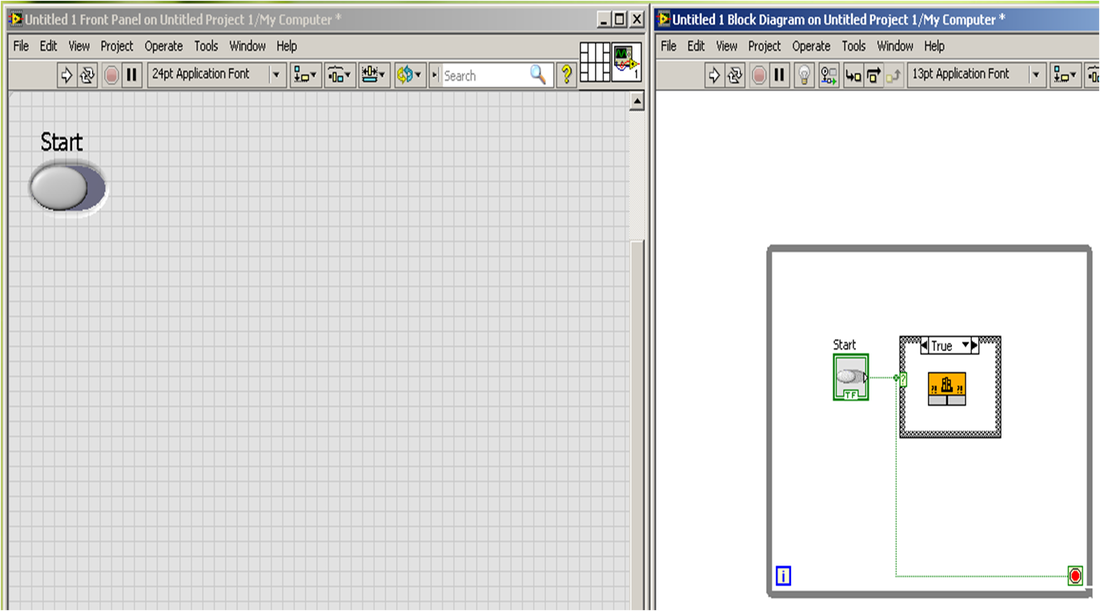
Figure 32. Modifying the VI to run continuously.
In order to check if OpenCV is working we modify the HelloWorld function adding the code shown below. Note that if you run the VI it shouldn't show any errors by now. In figure 33 you can see the code added to the HelloWorld function in the Visual Studio DLL.
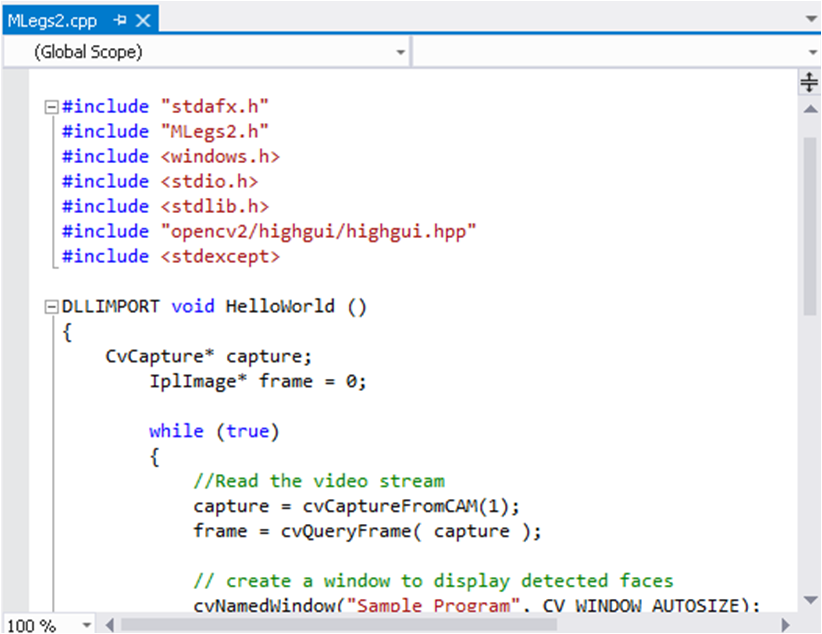
Figure 33. Code modified to test OpenCV in LabVIEW.
THE CODE.
// MLegs2.cpp : Defines the exported functions for the DLL application.
#include "stdafx.h"
#include "MLegs2.h"
#include <windows.h>
#include <stdio.h>
#include <stdlib.h>
#include "opencv2/highgui/highgui.hpp"
#include <stdexcept>
DLLIMPORT void HelloWorld ()
{
CvCapture* capture;
IplImage* frame = 0;
while (true)
{
//Read the video stream
capture = cvCaptureFromCAM(1);
frame = cvQueryFrame( capture );
// create a window to display detected faces
cvNamedWindow("Sample Program", CV_WINDOW_AUTOSIZE);
// display face detections
cvShowImage("Sample Program", frame);
int c = cvWaitKey(10);
if( (char)c == 27 ) { exit(0); }
}
// clean up and release resources
cvReleaseImage(&frame);
}
We finally execute the VI and it should show us something like the window shown in figure 34.
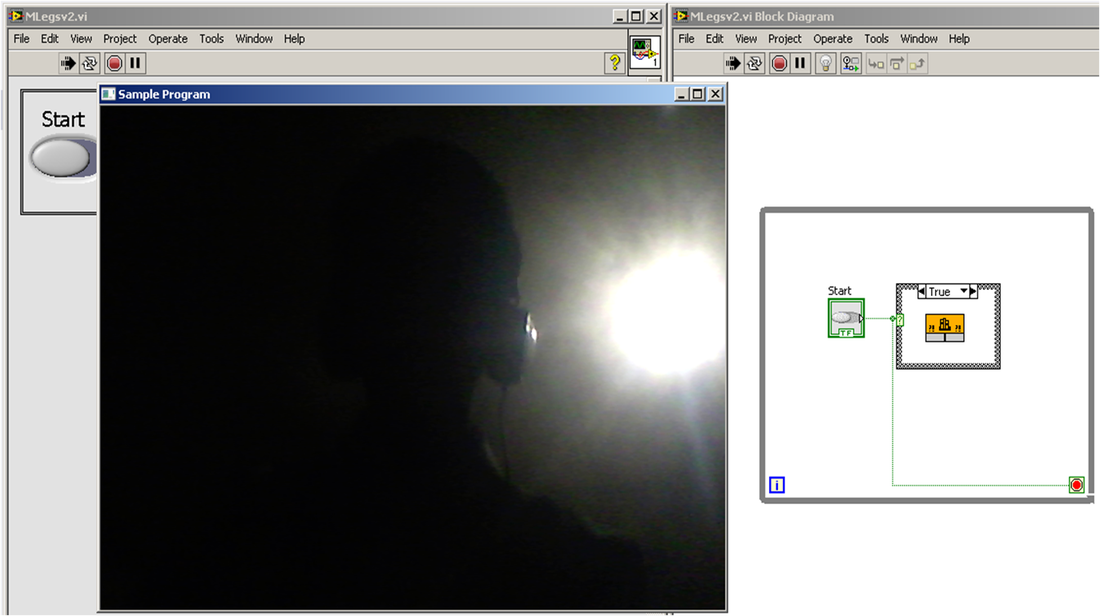
Figure 34. The code executing. Enjoy!
